
Using Browser’s Developer Tools For Customizing
Windstripe Themes
The most frequent question we get is how can someone edit the design of the purcahsed template. We added in our documentation the places where you can find all the styling applied to our Joomla templates, but many encounter issues in locating the exact place where one needs to do the change.
In this post we will show you the steps on how to use the browser’s developer tools to be able to check the styles applied to certain parts of a template and we will address some frequent questions.
Getting started
Firstly we recommend using Mozilla Firefox for this, but Google Chrome or any other browser is alright too.
To enable developer tools you need to press Ctrl+Shift+C or Ctrl+Shift+I for Windows/Linux or Cmd+Option+I for MAC in your browser.
A dock containing all the codes applied to the page should appear on your screen:

Now let's say you wish to modify the Award part, the We’re a global award wining company text.
- You need to click the inspector button (you click it every time you need to find information about an element from the page):
![inspector_btn]()
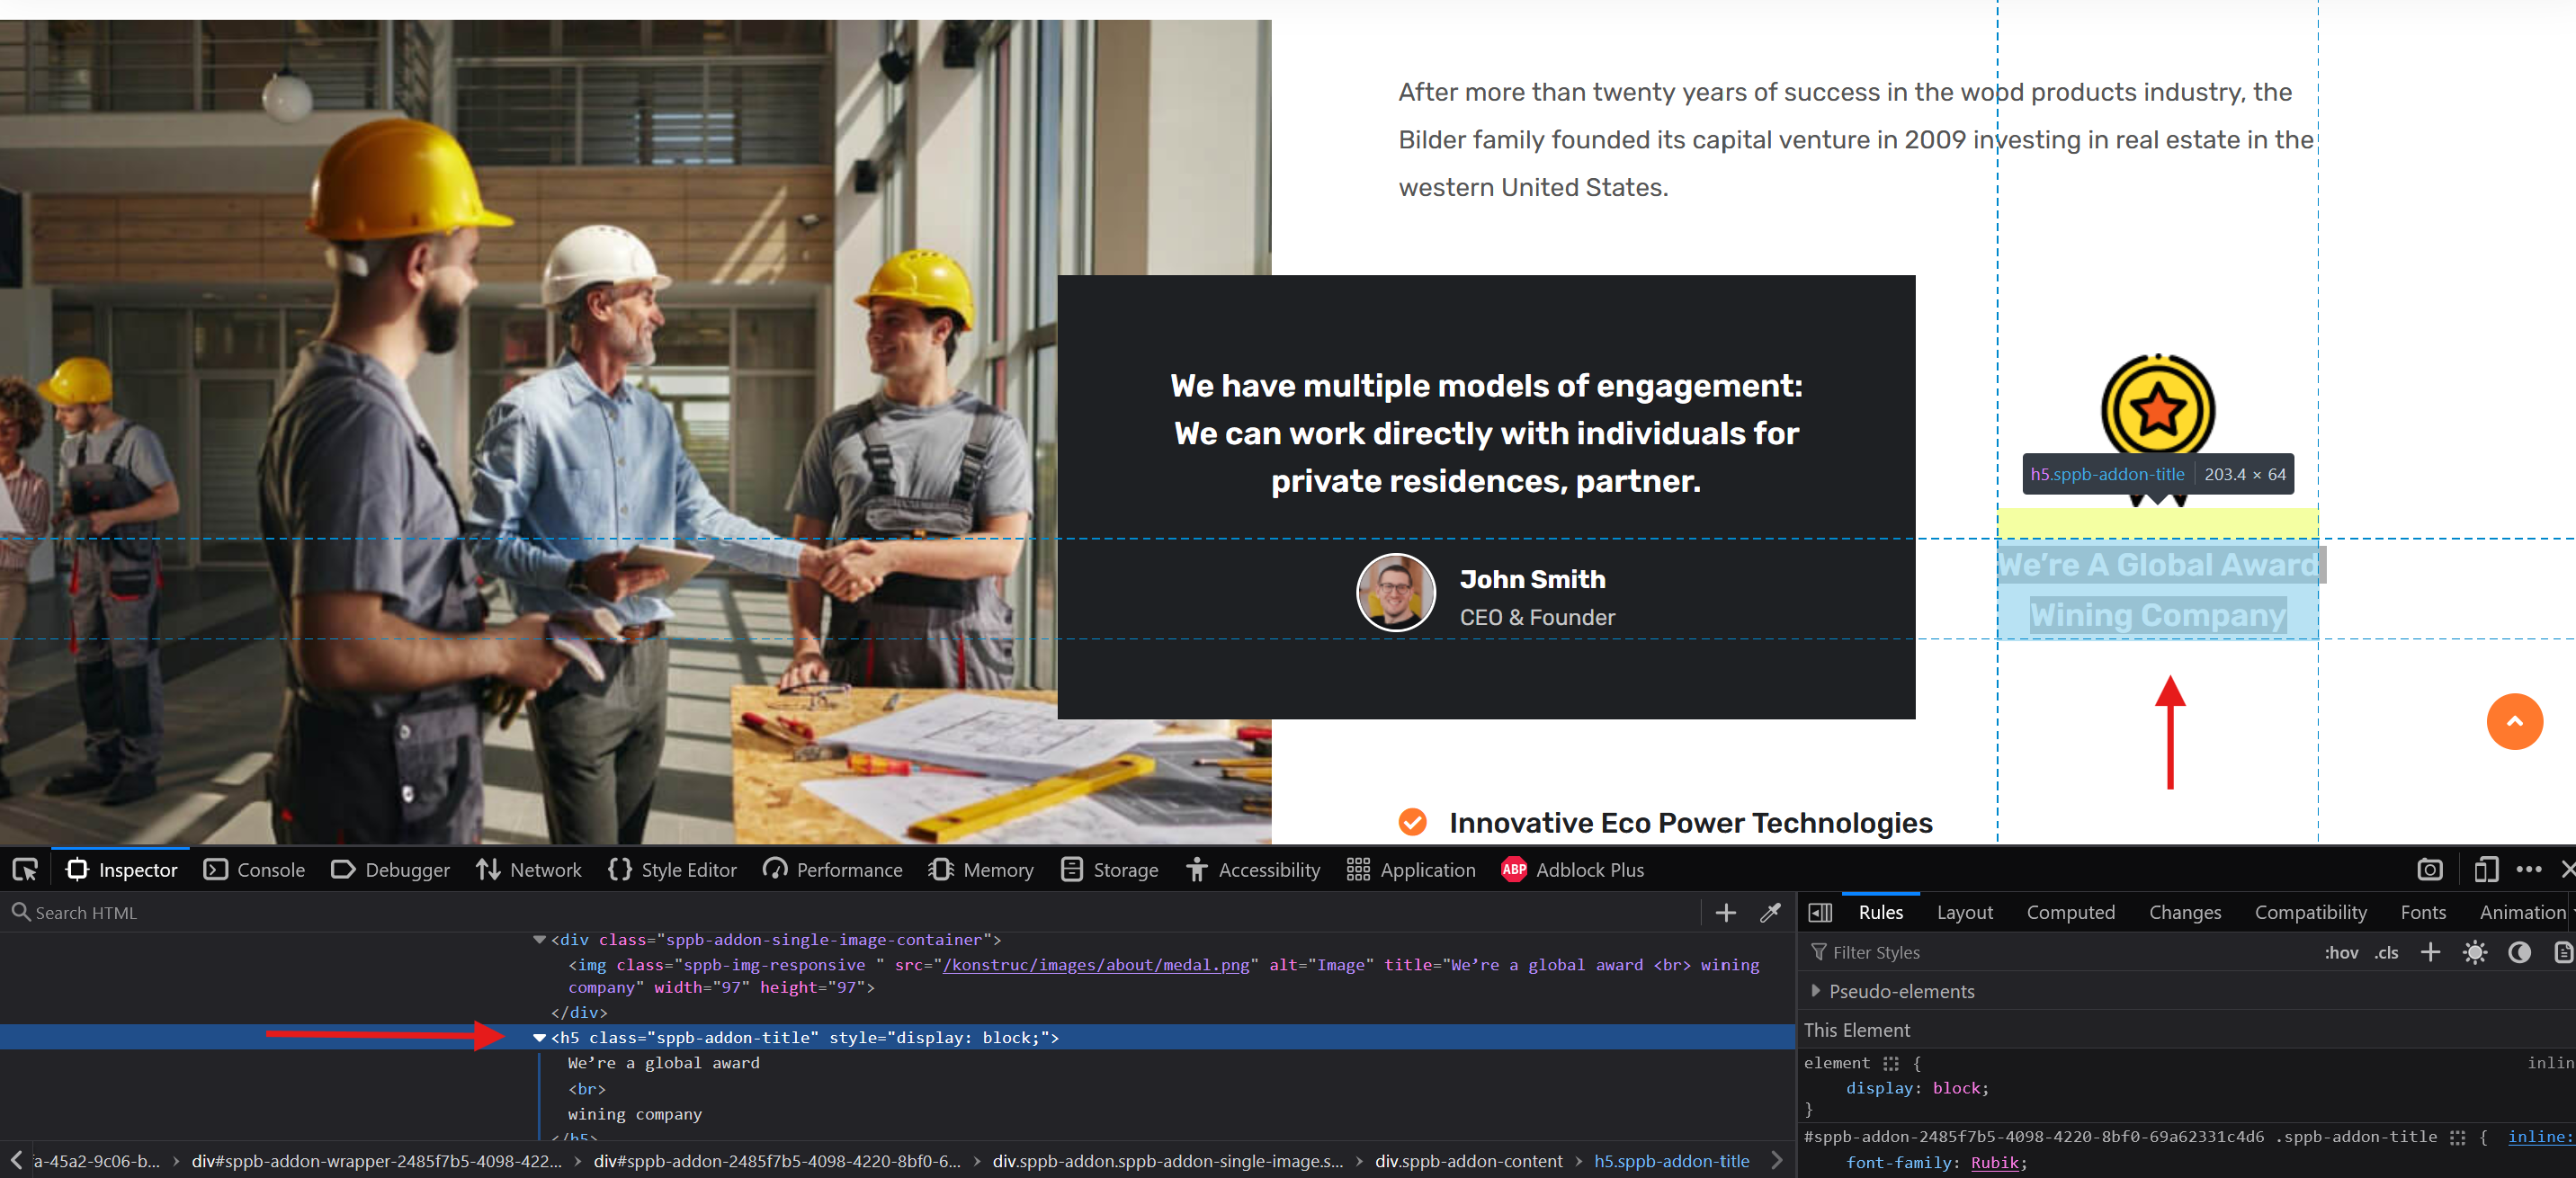
- After clicking on the inspector button, you now click on the html element you want. In our example you need to choose the heading.
![select_element]()
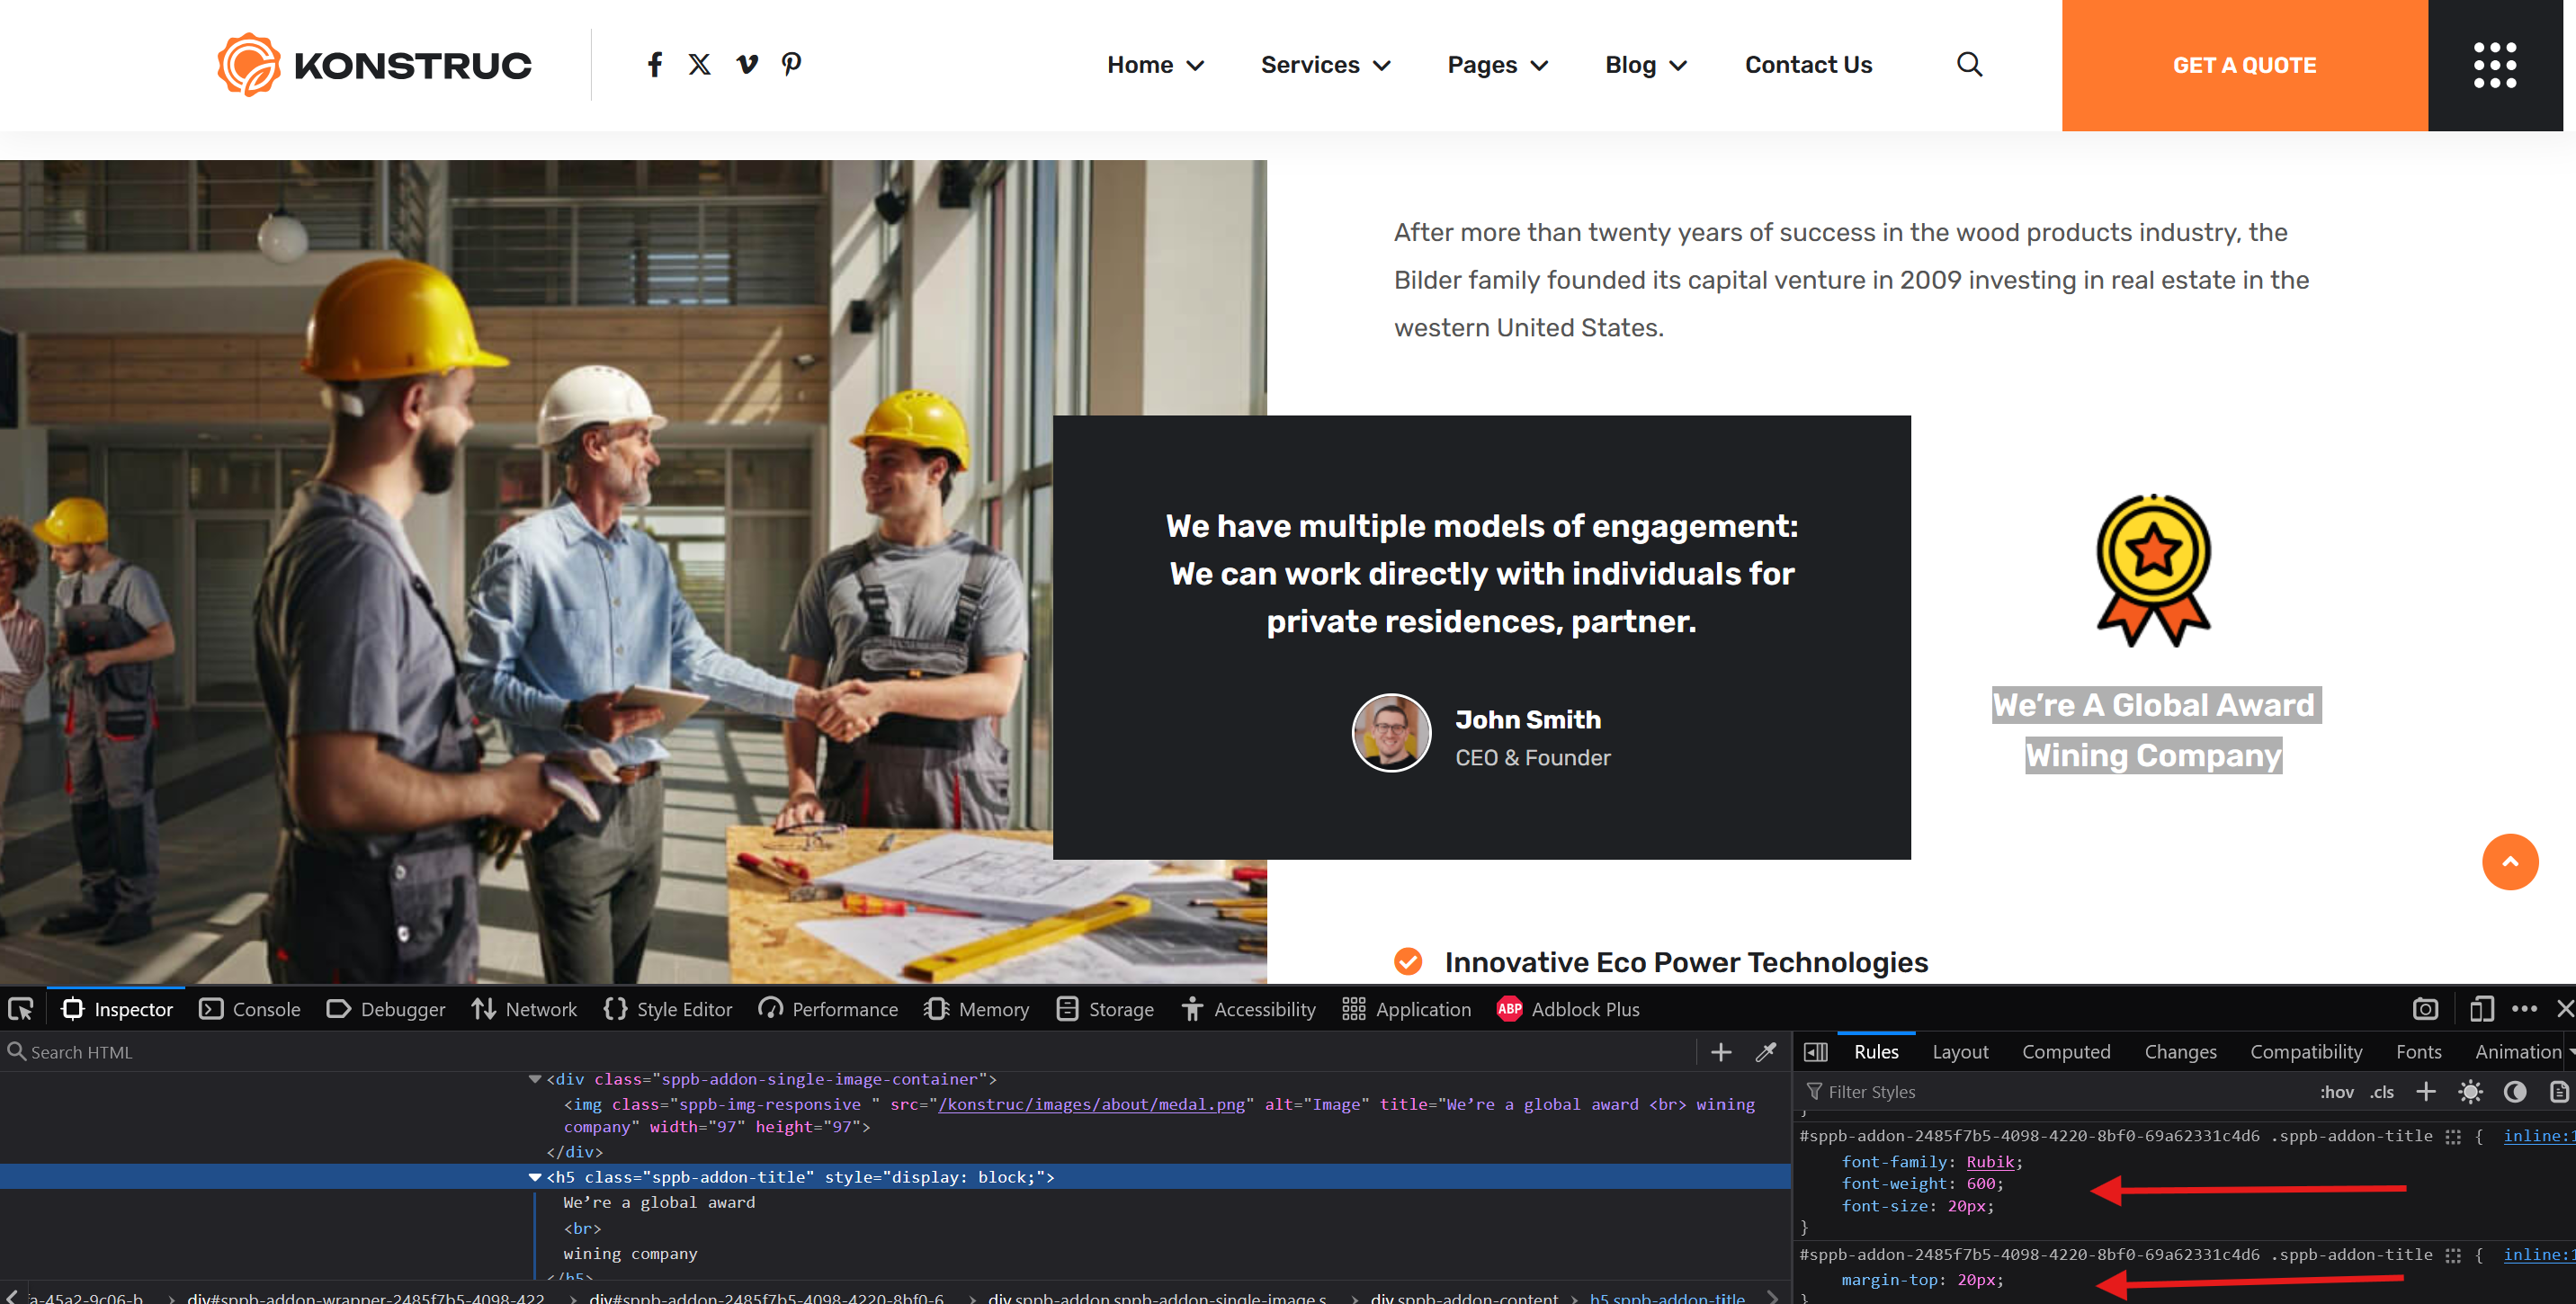
- Now you should be able to see on the bottom right the styles applied to the element. Here you have information about the styling applied, the location where you can find the styling and the line where you can find the styling. If there is no filename and it says there is an inline element, that means the style is applied to the element usually in the SP Page Builder's addon settings (check the faq below).
![checking_styles_applied]() This is everything you need to start editing the styles from our template.
This is everything you need to start editing the styles from our template.

 This is everything you need to start editing the styles from our template.
Using browser's developer tools is very useful, as you can test how your modifications would look before you make them. To wrap things up, this is how to use this tool efficiently:
Frequent questions
A list of the questions that arise most often when using this tool.
How can I edit the Logo (make it wider/shorter/higher, remove filtering etc)
Usually we put a limit on a logo image's height or width, so it looks good on the demo. However your logo may be different so you need to adjust the parameters according to your needs.
Also when using logo variations (one style for the default header and another one for the sticky header) we use css filtering to change the logo's appearance.
You can view and change/remove these settings using browser's developer tools as explained above to locate these changes.![]() As you can see from the image, the modifications applied to the logo can be found in the custom.css file, on line 677.
As you can see from the image, the modifications applied to the logo can be found in the custom.css file, on line 677.
What if the style is not in the custom.css file, but it appears as inline?
If a style appears as being inline, this means it can be found in three places.
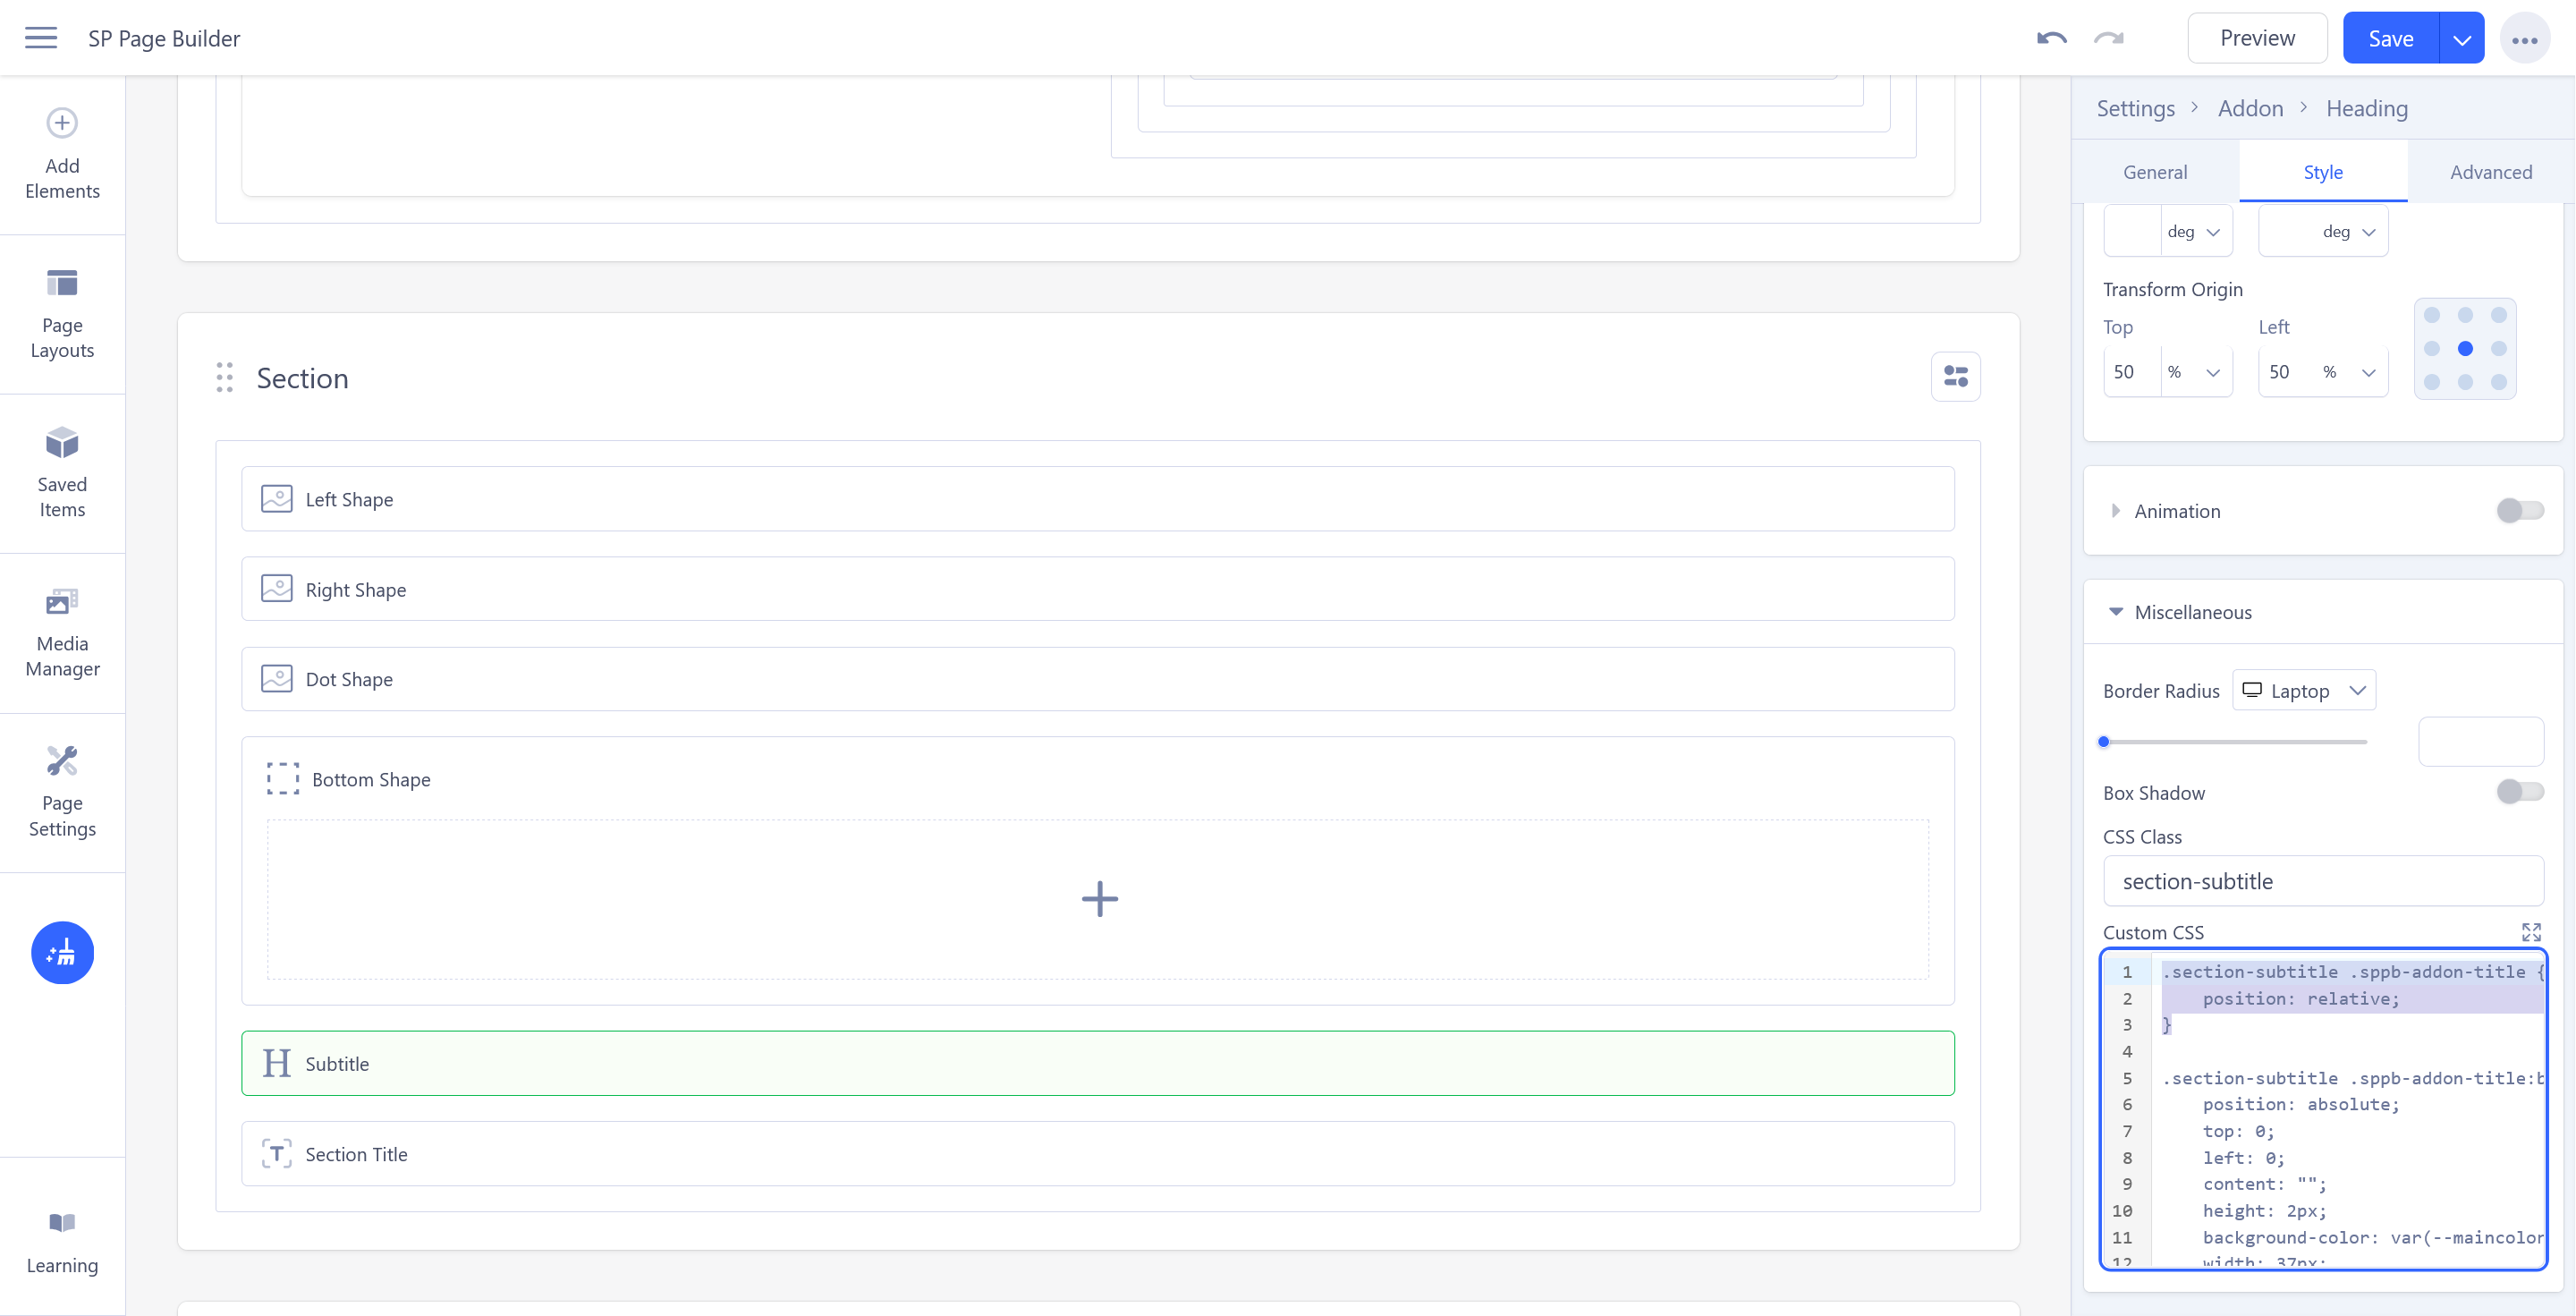
First case is when working with a SP Page Builder addon. Inline styles are found and generated in the addon's settings:
 or in the style tab of the addon:
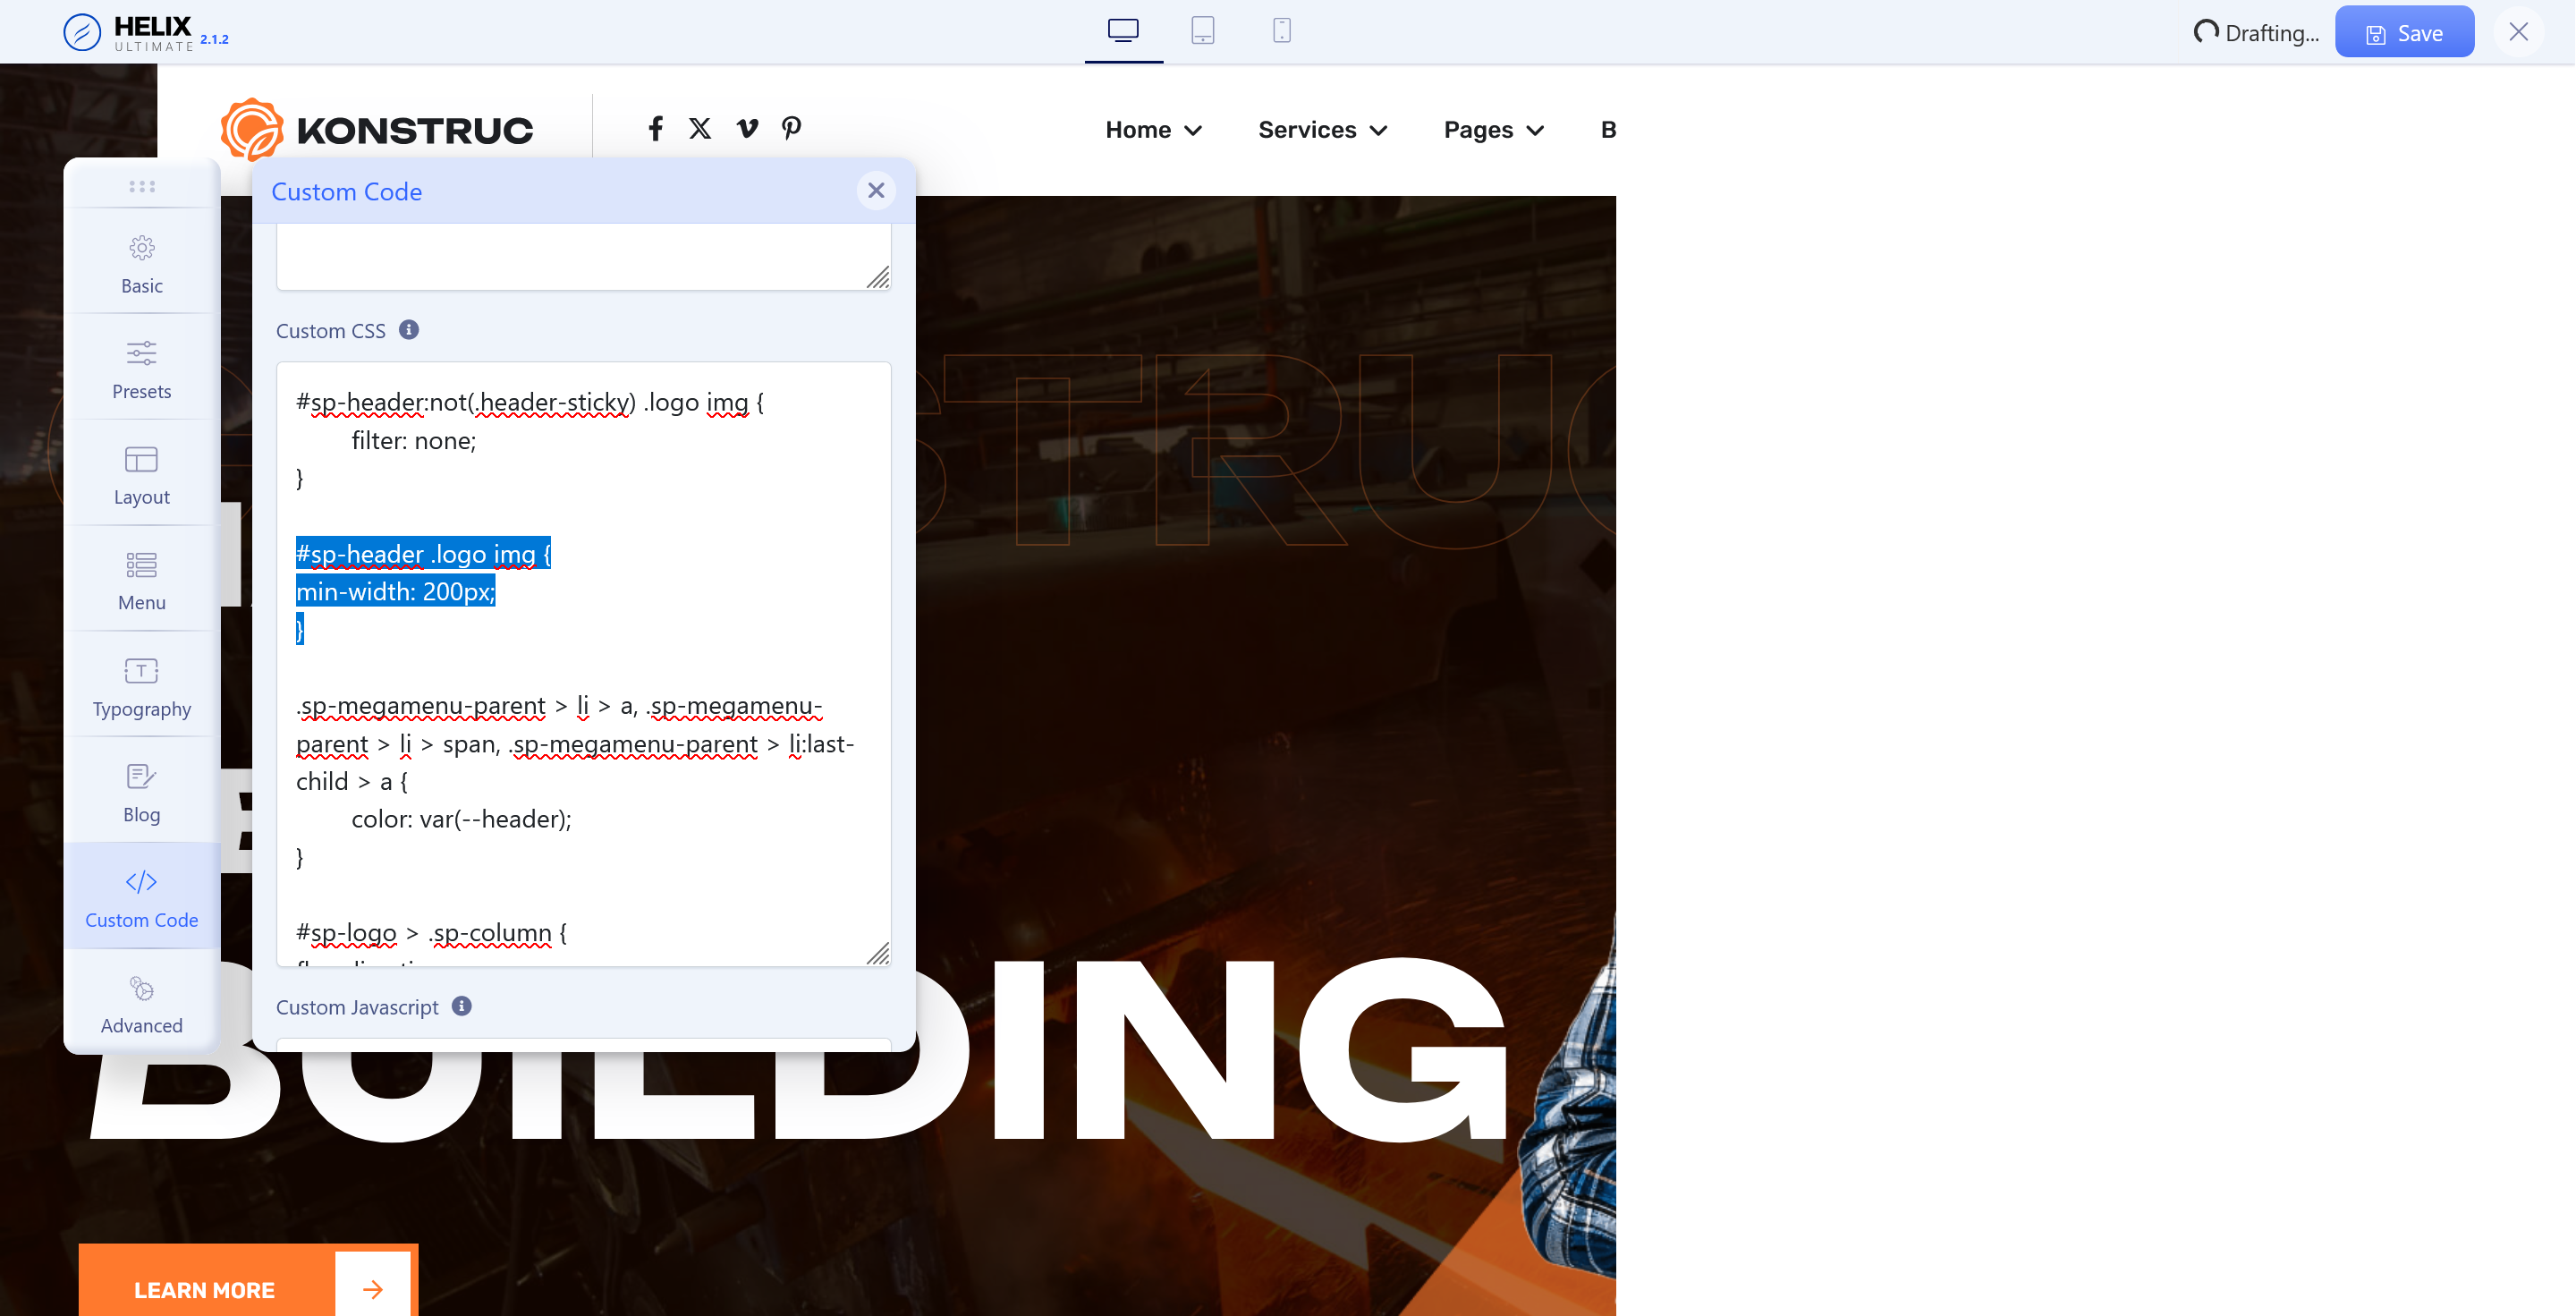
Second case where inline styles are located is the template options, the custom code tab. This is usually where you can find general styles for the header (logo, menu)
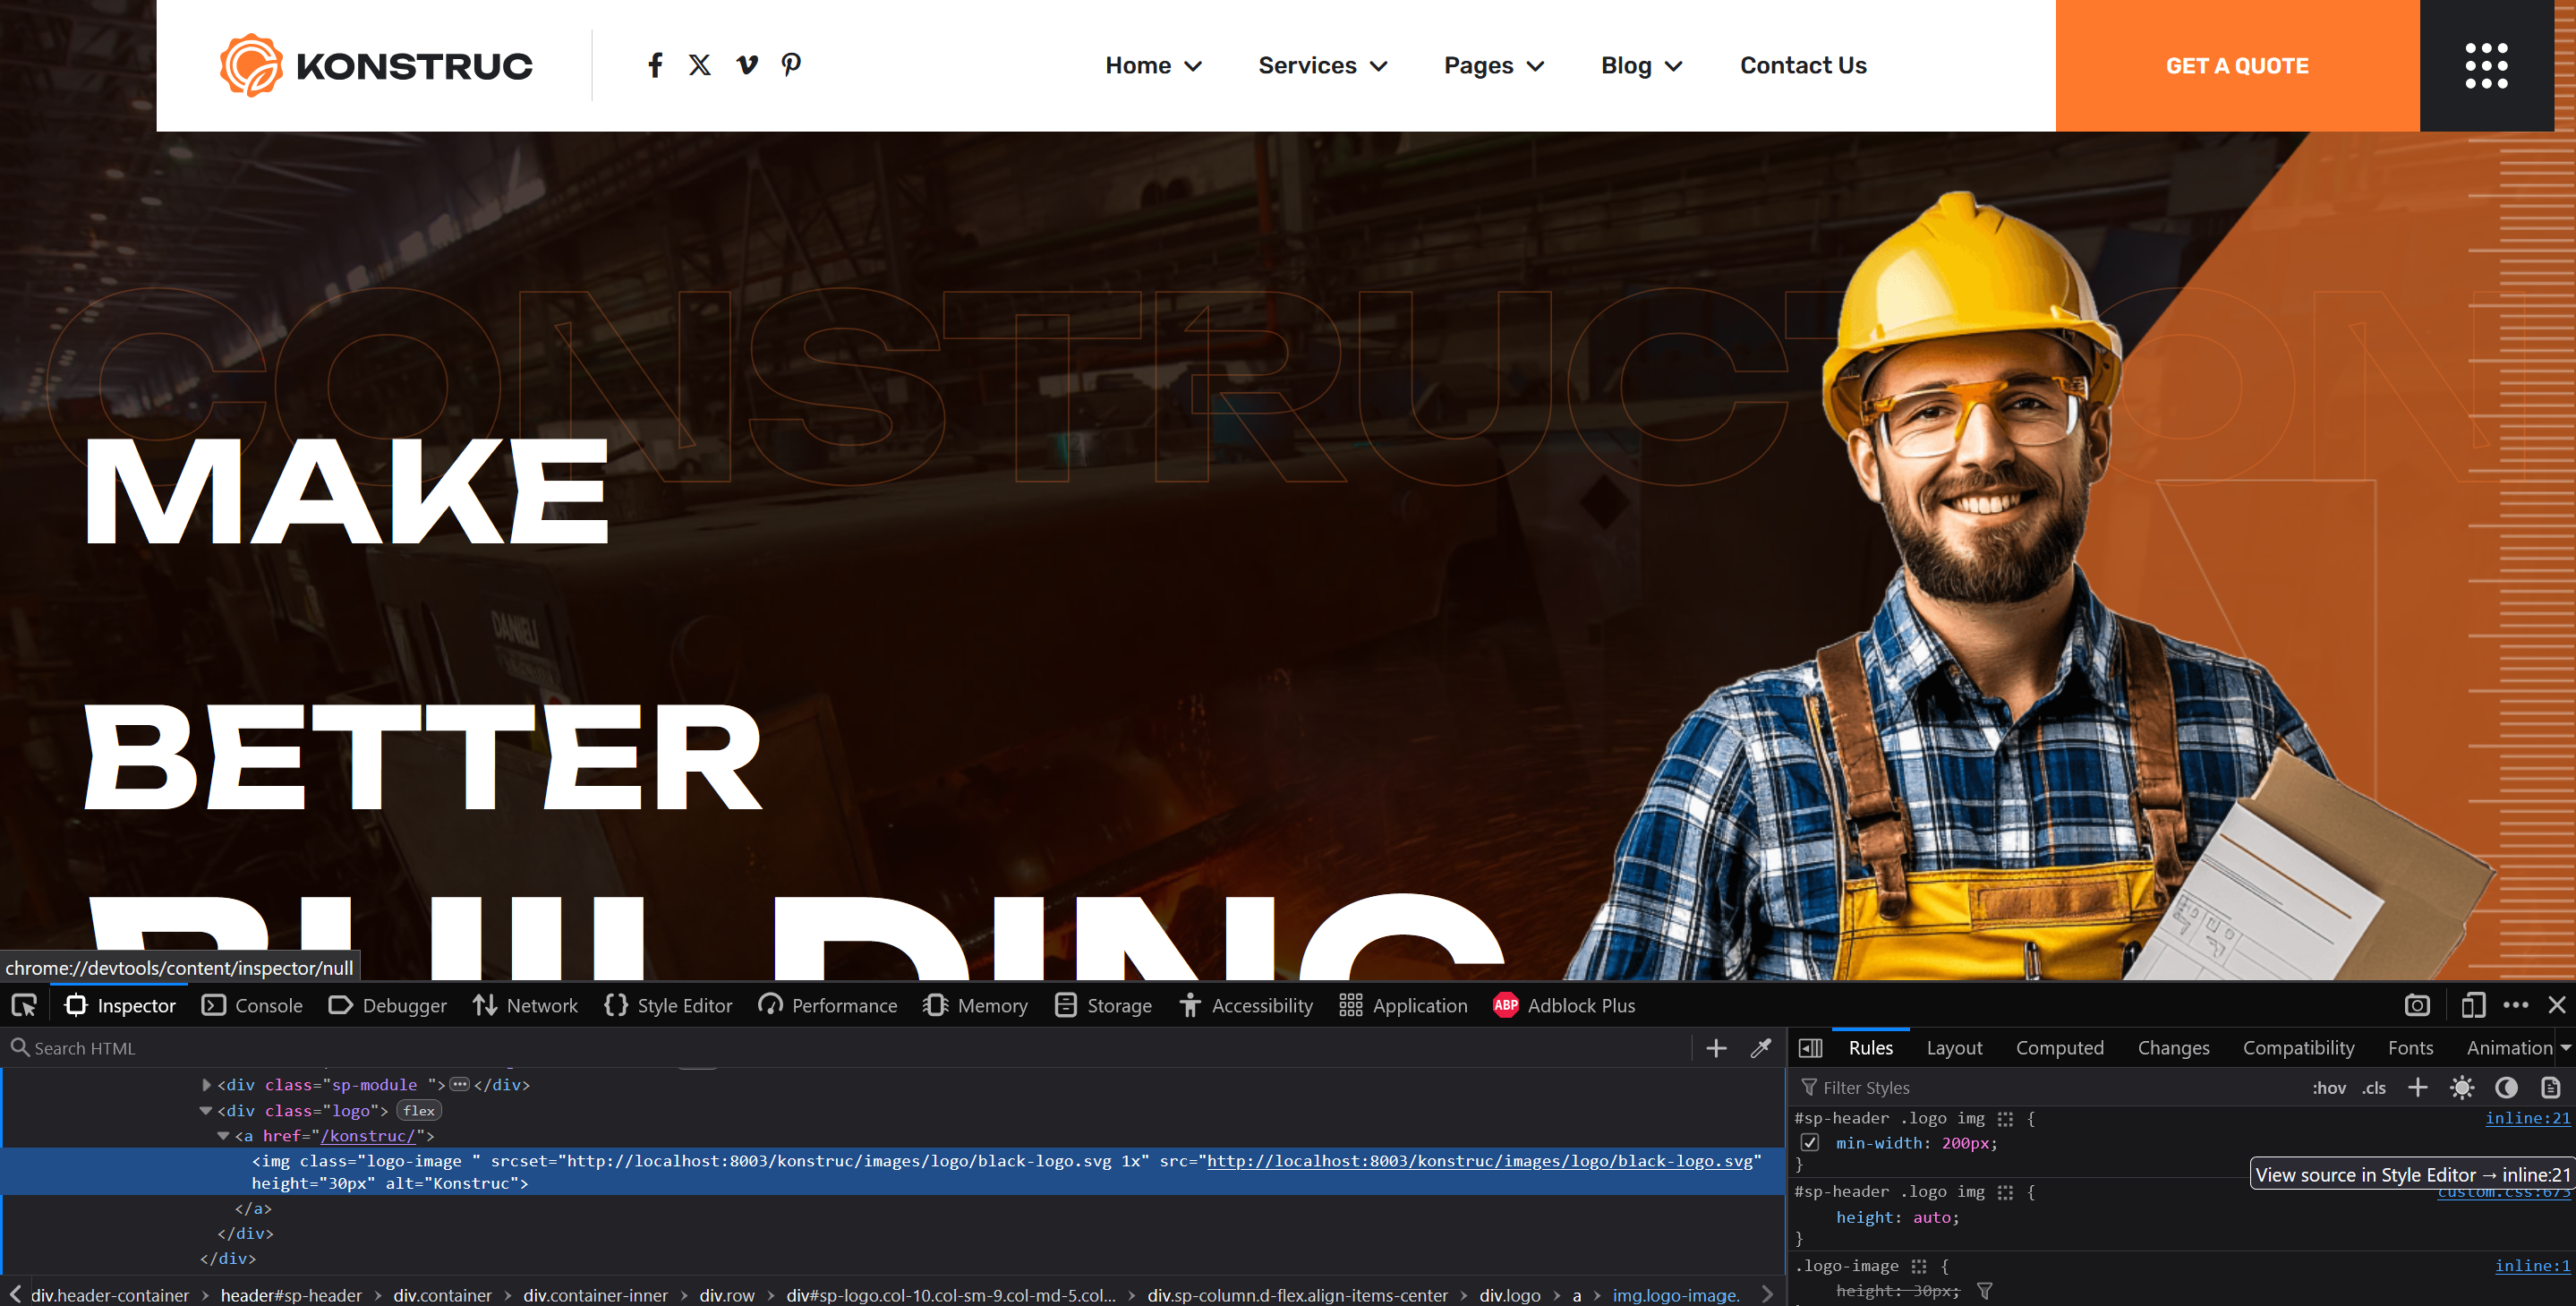 As you can see for this template style only, the logo has a min-width set up. A setting you can edit in the template options:
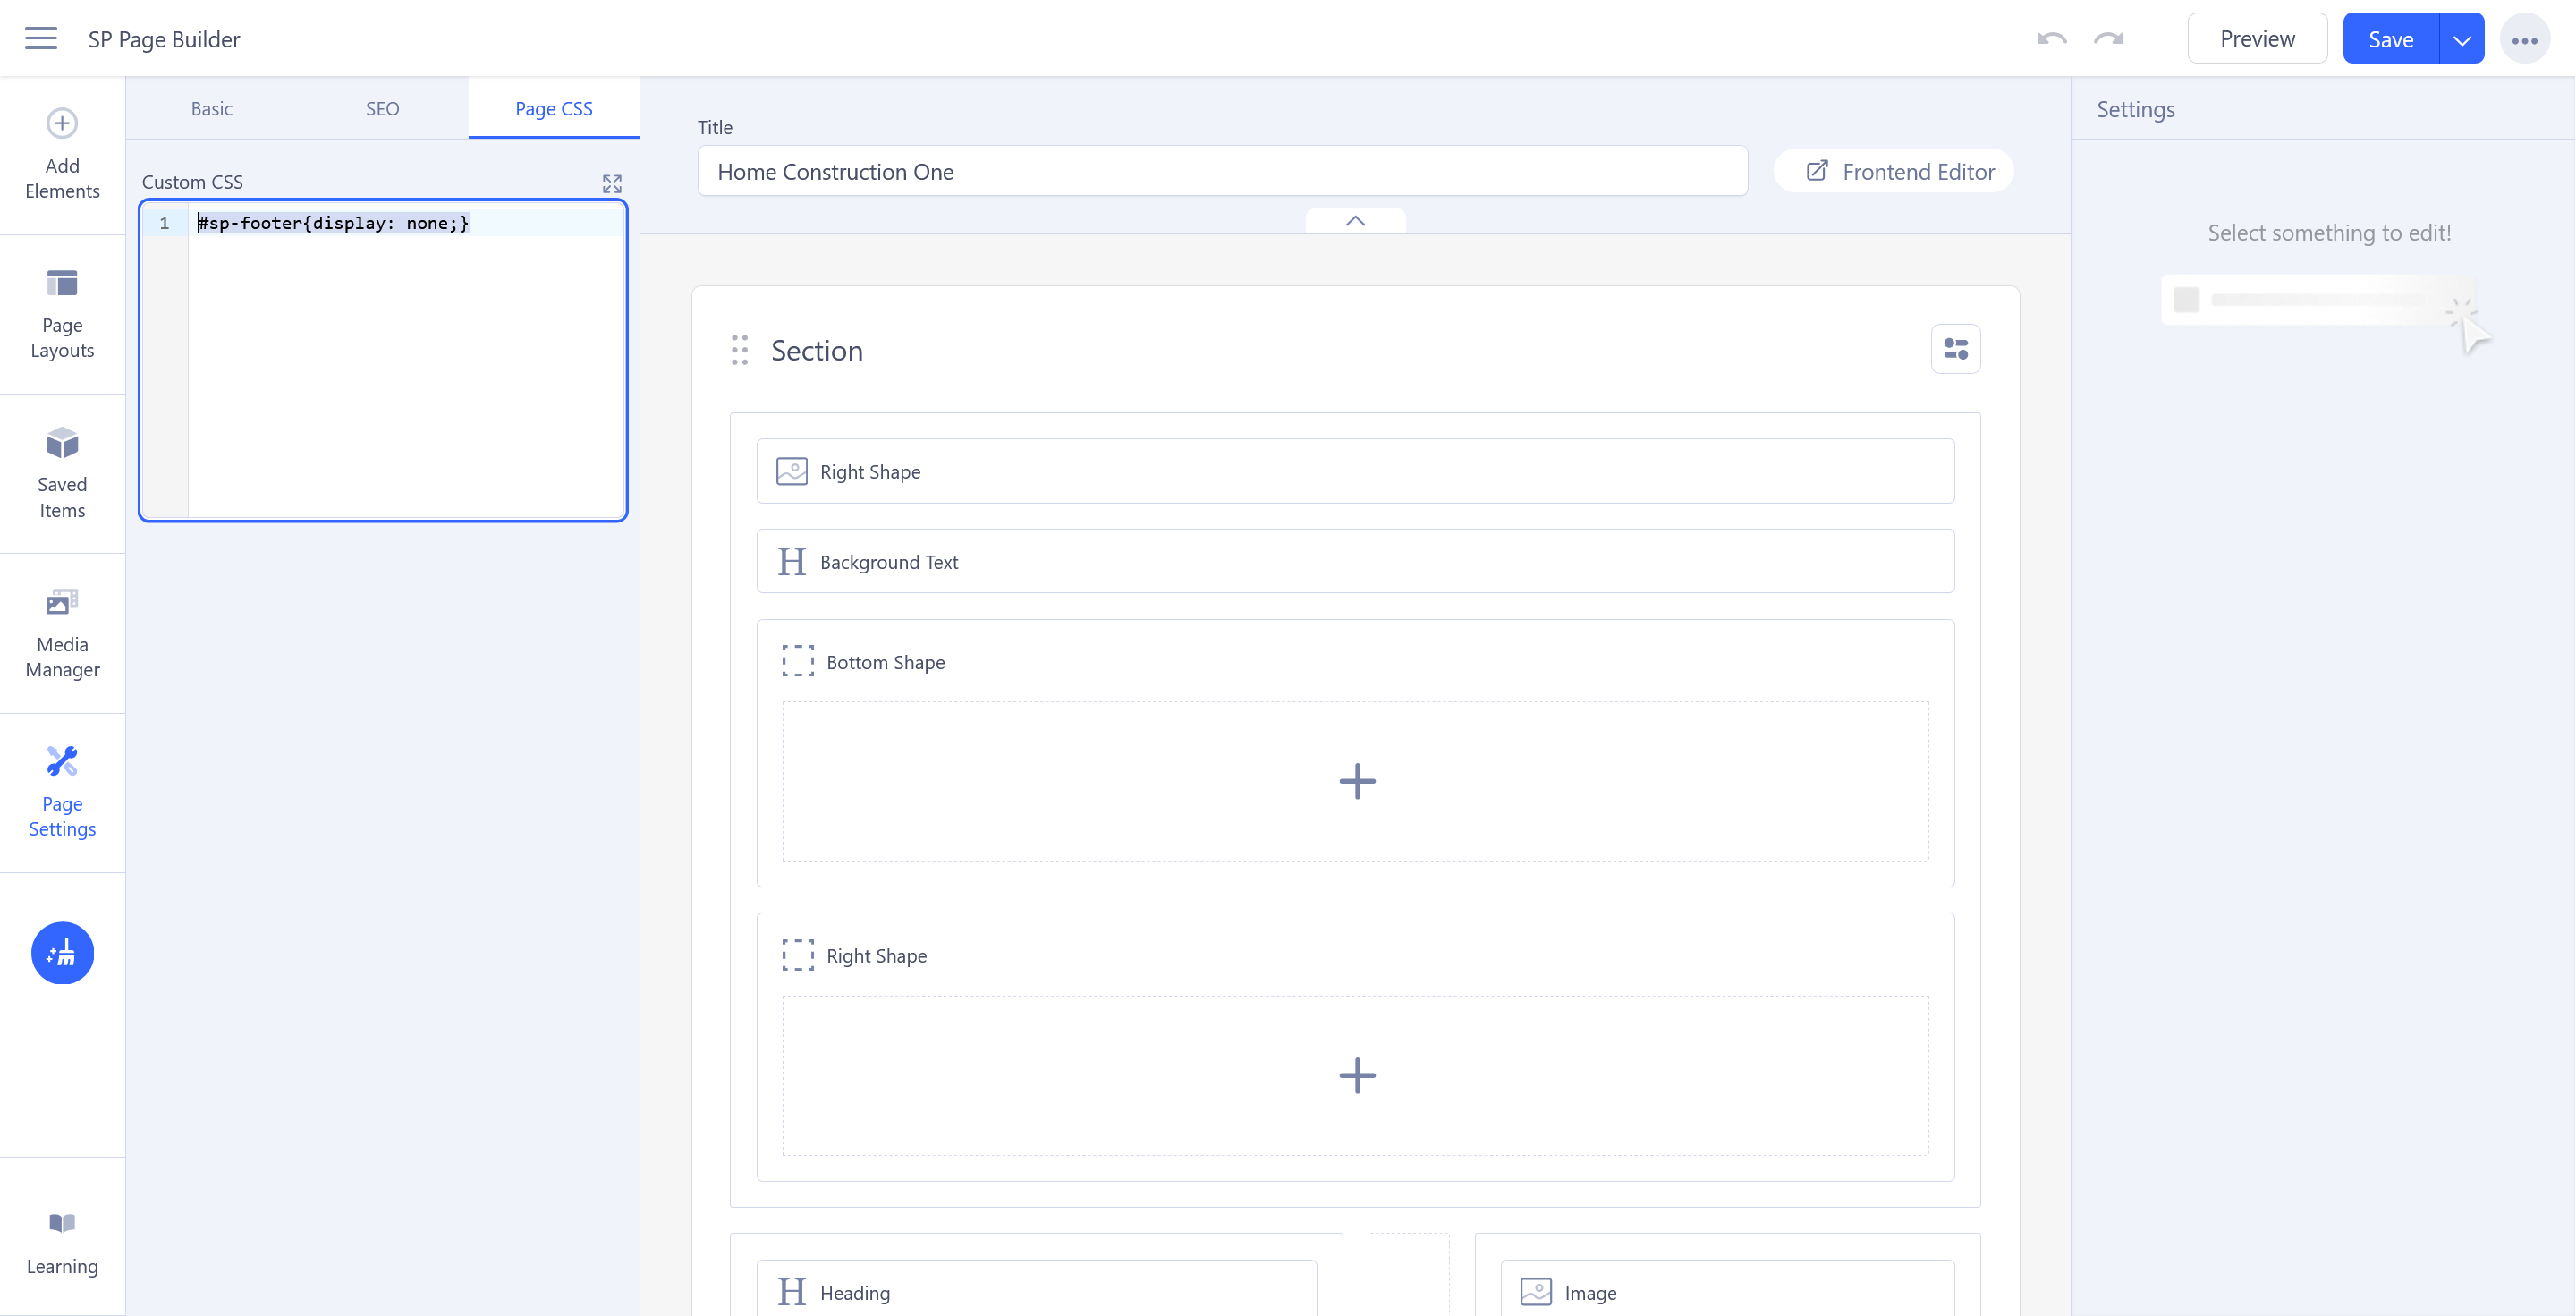
Third case, although rarely, inline styles may be found in the SP Page Builder's page css. You can find this by clicking on the Page Settings - Page CSS tab:
Menu items are on two lines, not inline like in the demo
If your menu item names occupy more space than the ones you see in the demo, you may exceed the space allocated for the menu.
You can solve this by reducing the space/font-size of the menu items to fit in one line.
You can view and change these settings using browser's developer tools as explained above to locate these changes:
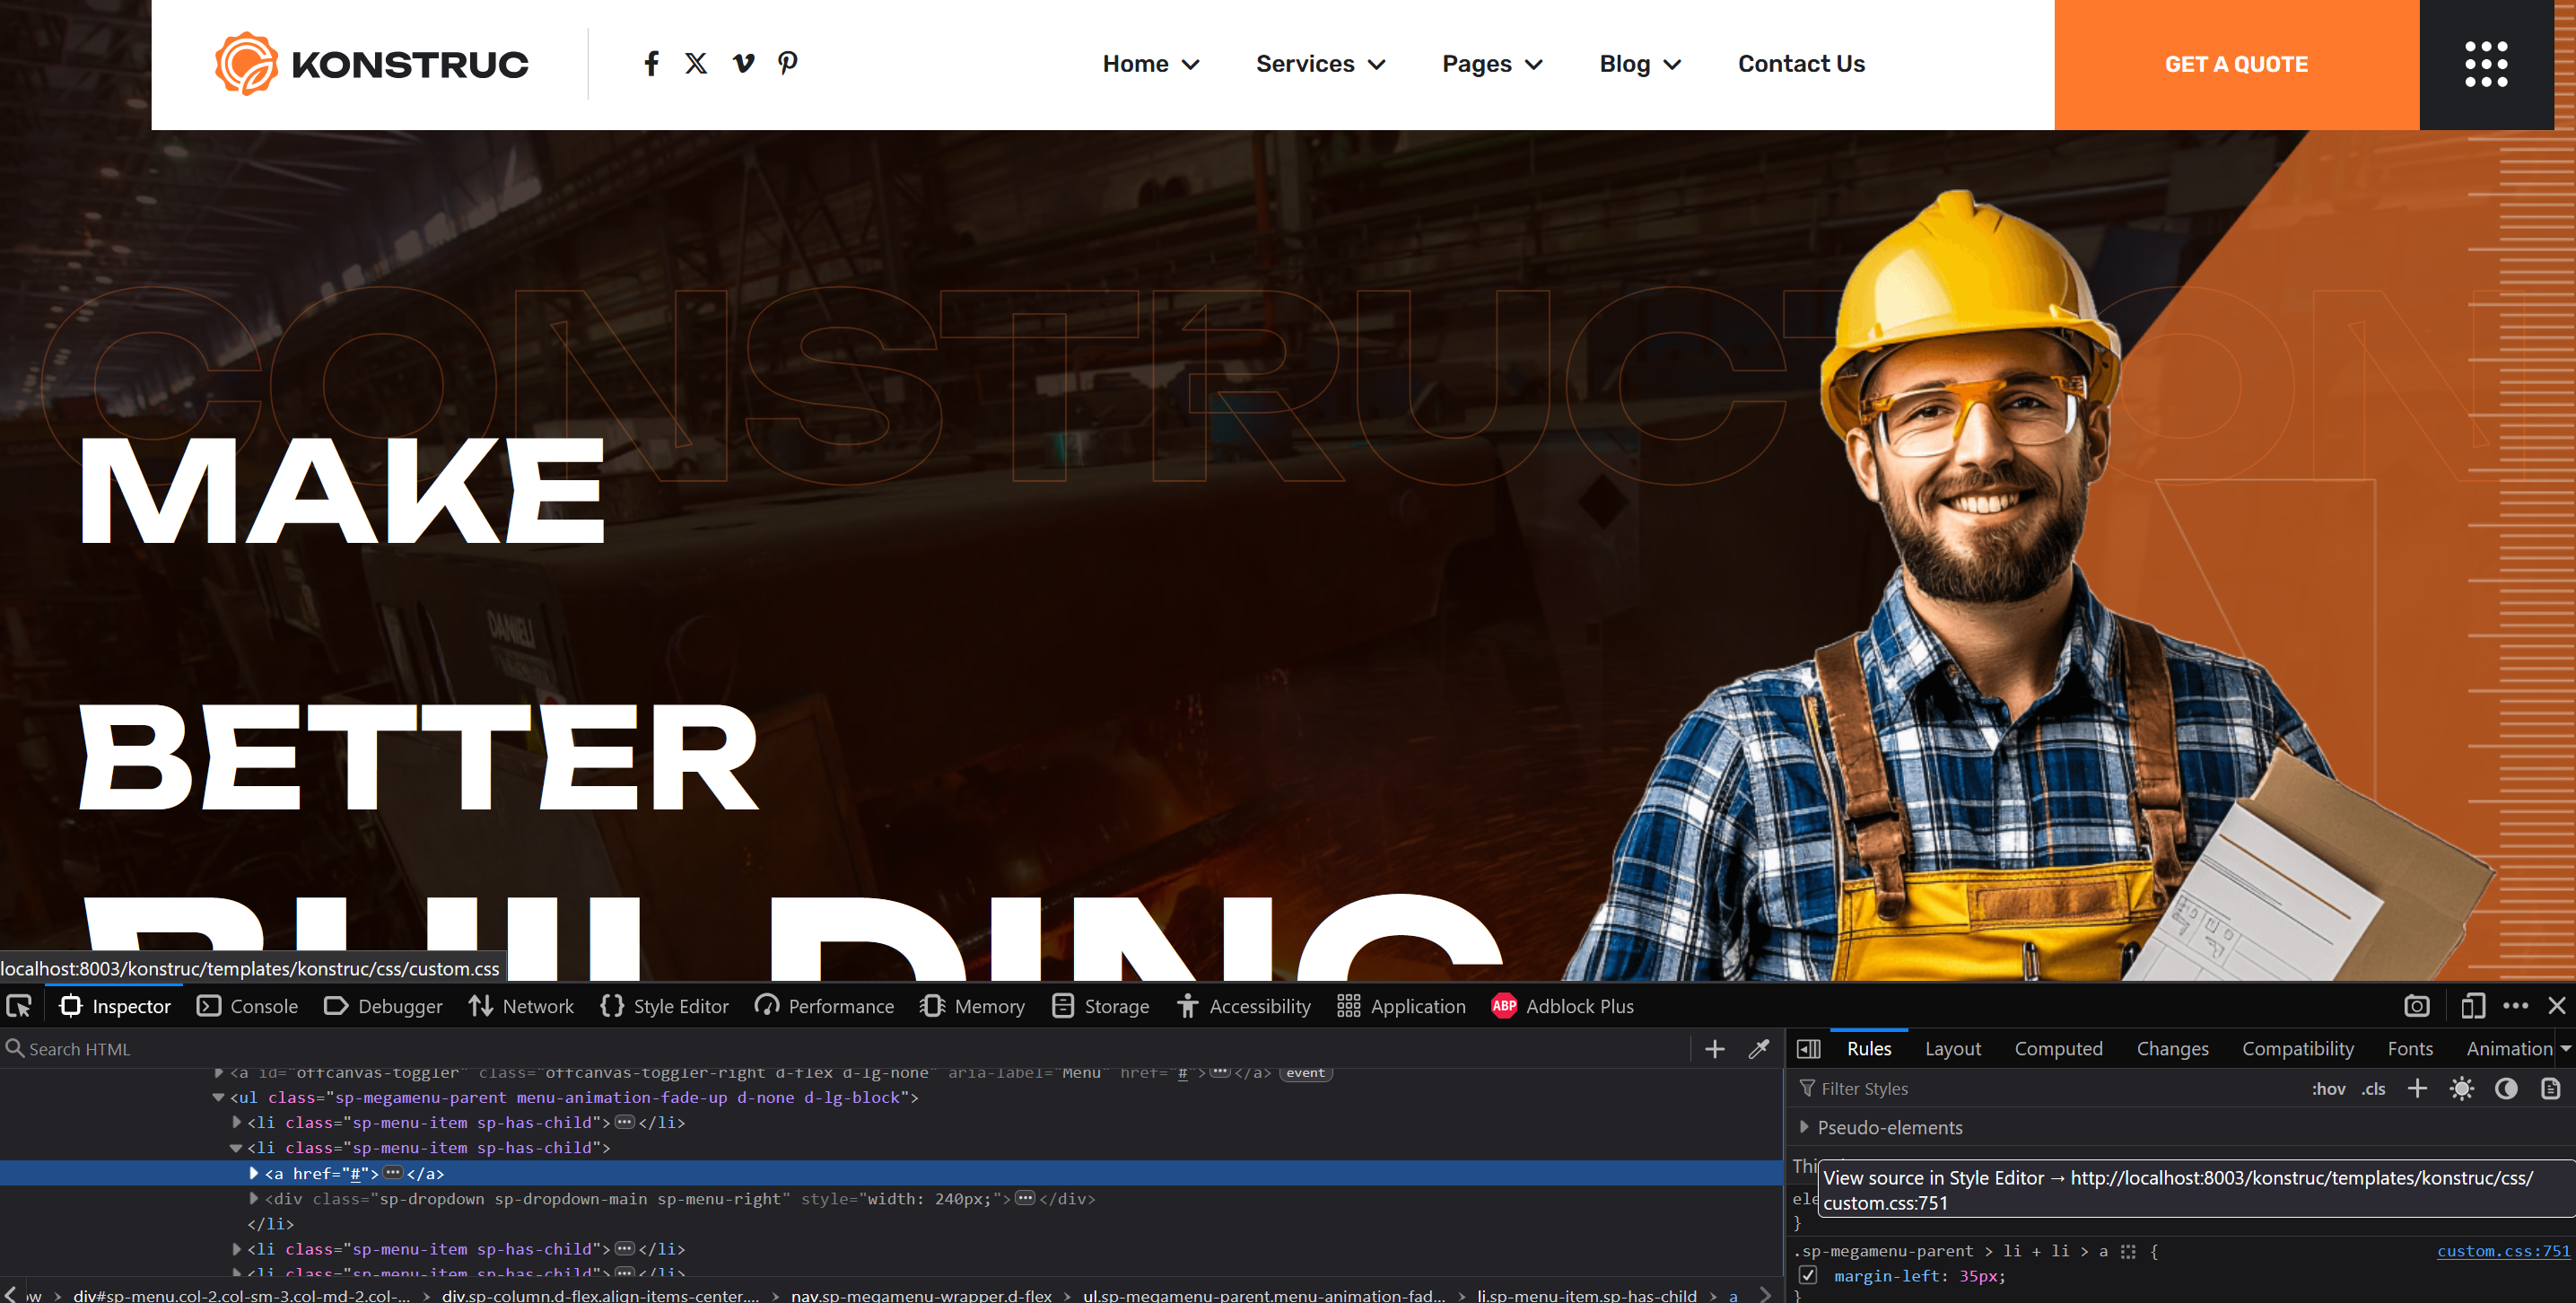 As you can see in the example picture, the spacing between the menu items in our example is 35px and it can be found in the custom.css file, on line 751. If your menu items fall on two lines, you need to reduce the 35px spacing.
If even reducing the space won't solve the issue and you need more spacing for the menu, then you need to adjust the template layout so that the menu occupies more space.
The changes made to the custom.css file do not apply
If you don't see the changes you make, check with browser developer tools to see if they are applied. If you don't see them applied to the custom.css file, then it's most definetly a cache issue. Clear your browser/Joomla/server cache and check again.
Also it is wise not to enable any compression/cache or use tools like JCH Optimize until you have finished your website.
